Applied Computing 2 |
AutoCAD 3D • Moebius ring |
2006. spring semester |
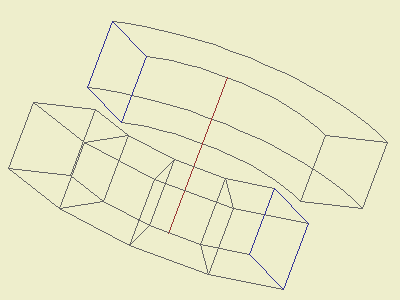
Exercise: create the model of a Moebius ring shown below!

P In this exercise you will create a "Möbius ring" — an element, which (without the frames, of course) has only one face and one edge. The frames, while rotating 360° in the XY plane, will rotate 270° about their own center.
The outer size of the frames should be 80×80×10 cm, the inner hole 60×60×10 cm.
7 Start creating a frame (as a solid model) by drawing two Box elements (of course on the frames' own "Frame" layer). The center of the boxes (the midpoint of their axis) should be in the origin:
Command: BOX
Specify corner of box or [CEnter] <0,0,0>: -40,-40,-5
Specify corner or [Cube/Length]: 40,40,5
Command: [Enter]
(for restarting the same command)
Specify corner of box or [CEnter] <0,0,0>: CE
Specify center of box <0,0,0>: [Enter]
Specify corner or [Cube/Length]: 30,30,5
7 SUBtract the smaller box from the the larger one!
7 Create a Block from the frame (insertion point 0,0,0)! Since we should be able to change the color of the block, the color of the frame should be set to ByBlock, before defining the block.
7 Since the radius of the base circle, connecting the center points of the frames should be 200 cm, to move the frame to it's starting position, you should rotate it about the X1, then the Z2 axis, finally move it 200 cm "down"3 (-Y direction).
1 Rotate3D Last [Enter] 0,0 100,0 90
2 Rotate Previous [Enter]0,0 -90
3 Move Previous [Enter]0,-200 [Enter][Enter]
The next step is the placement of the frames. Since the frames rotate 90° about their own center while they rotate 120° in the base plane, it's enough to draw 1/3 of the ring.
7 First, copy the frames to their position (polar Array, 6 element, filling 120 degrees), after it rotate each of them about it's own center. (Prior to that you're suggested to set an axonometric view of course!) To simplify this second rotation, the User Coordinate System (UCS) should be aligned with the frame you want to rotate (UCS OBject, then click on the frame to be rotated), since this way you can use the (2D) Rotate instead of Rotate3D, and the center of the rotation will always be the current UCS's 0,0 point. The frames should be rotated with 18, 36, 54, and finally 72 degrees (it's pointless to rotate the last one with 90° of course).
The solid model usually easier to create and modify – but it cannot be used to create some of the surface types used in architecture (e.g. conoids). It's not suitable for drawing the deformed quadrangular faces of this ring either. A surface model will give us a satisfying (approaching) result.
7 Draw the faces of the ring (on a new "Glass" layer), as 3dFace elements! Use the 3dOrbit to find viewpoints, where the points to be connected are all easy to find. Start the drawing of 3dFaces by connecting the two frames, since this way its 3rd and 4th points can be used as the 1st and 2nd points of the next 3dFace, and you will only have to show the 3rd and 4th points of the new face.
7 After connecting all the frames, the last frame should be Erased, and the 5 frames, and the 20 (5×4) faces should be rotated (Array) to create the remaining 2/3 of the ring.
While working, you will usually use the 2D wireframe (View • Shade > 2D Wireframe) display mode, since this way all the points can be seen. To be on the safe side, it's useful to regularly check the surfaces by selecting the hidden (View • Hide), or a shaded view (View • Shade > Flat Shaded, or Gouraud Shaded – with Edges On, if you prefer).
To get a more attractive view, you can Render the model, producing a more realistic image of it by using it's geometry, lighting, and (possibly transparent) materials.
In AutoCAD you can use three types of rendering:
• Render: aa quick, base-level render, without applying any materials, or adding any lights (it uses a virtual "over-the-shoulder" distant light)
• Photo Real: a photorealistic scanline render
• Photo Raytrace: a photorealistic raytraced render, using ray tracing to generate reflections, refraction, and more precise shadows.
You can set the materials in the dialog box of the View • Render > Materials menu (rMAT).
Click on the [New] button to "define" a new material. In the appearing dialog box, type a name for the material, select one of the Attributes from the list on the left, and set (change) it's value:
• Color/Pattern: adjusts the main (diffuse) color of the material
• Ambient: adjusts the material's ambient (shadow) color
• Reflection: adjusts the material's reflective (highlight or specular) color
• Roughness: adjusts the roughness or shininess of the material (lowering Roughness decreases the size of the material's reflective highlight)
• Transparency: adjusts the transparency of the object
• Refraction: adjusts refraction of the object (Photo Raytrace rendering only)
• Bump Map: makes the Bitmap Blend area available to specify the file name of a bump map.
You can experiment of course, but for us now it is enough to set Transparency! For Color, use the By ACI (AutoCAD Color Index) option: this way the color of the object will be used.
After pressing [OK], you return to the Materials dialog box. You can attach the newly created material to the "Glass" layer in the dialog box opened by the [By Layer] button.
For the frames use one of the pre-defined materials of AutoCAD. They can be imported in another dialog box, which can be opened by the [Materials Library] button.
Finally create the rendered image (View • Render > Render, or RendeR, Photo Raytrace mode). You can specify a background color (or picture) in the dialog box opened by the [Background] button.
This picture shows two objects, both created by revolving the blue square about the red line. The upper one is a solid, created by the Draw • Solids > Revolve command, the other is a surface model, created by the Draw • Surfaces > Revolved Surface command. In the second case, all edges will be straight, but if you move your mouse over the image, you can see that on the rendered image, the unnecessary edges can be smoothed.
(c)2006. STROMMER László, BUTE Department of Architectural Representation